

Comments by users


-
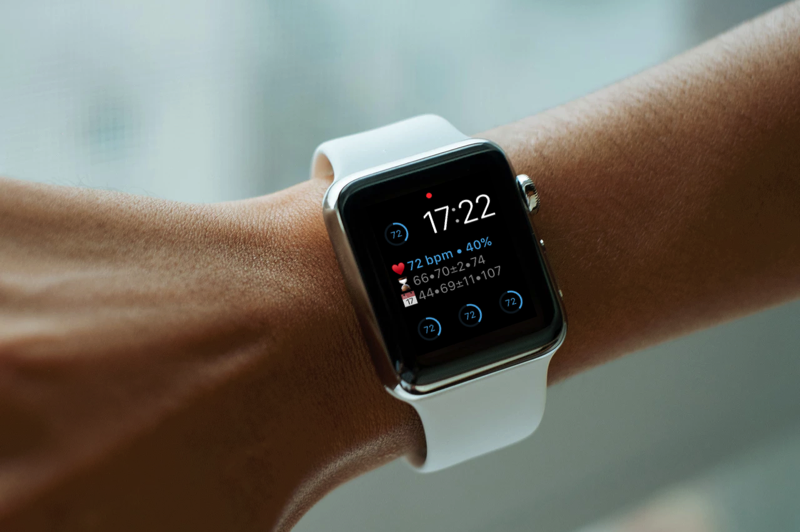 Image slide caption
 -
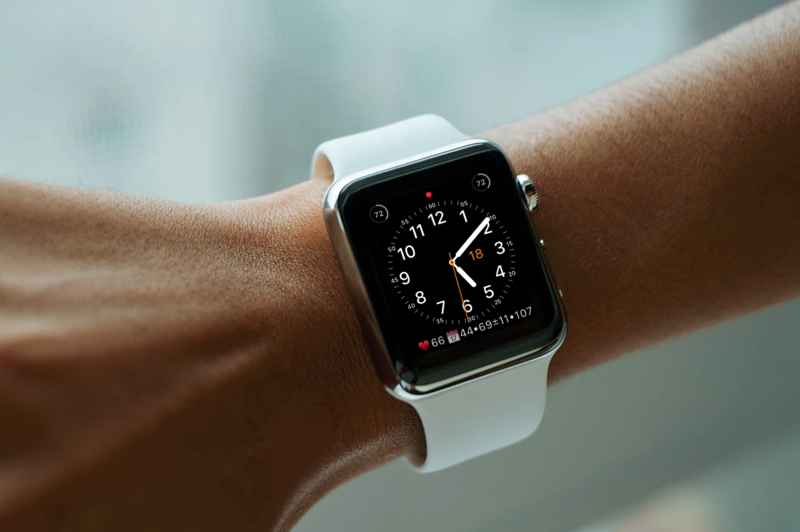 Image slide caption
 -
 Image slide caption
 -
 Image slide caption
 -
 Image slide caption
 -
 Image slide caption
 -
 Image slide caption
 -
 Image slide caption
 -
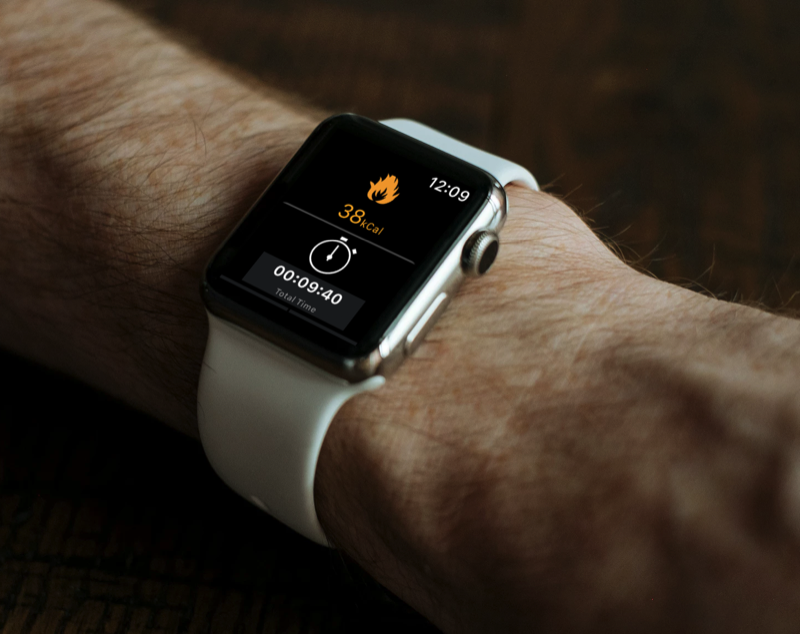 Image slide caption
 -
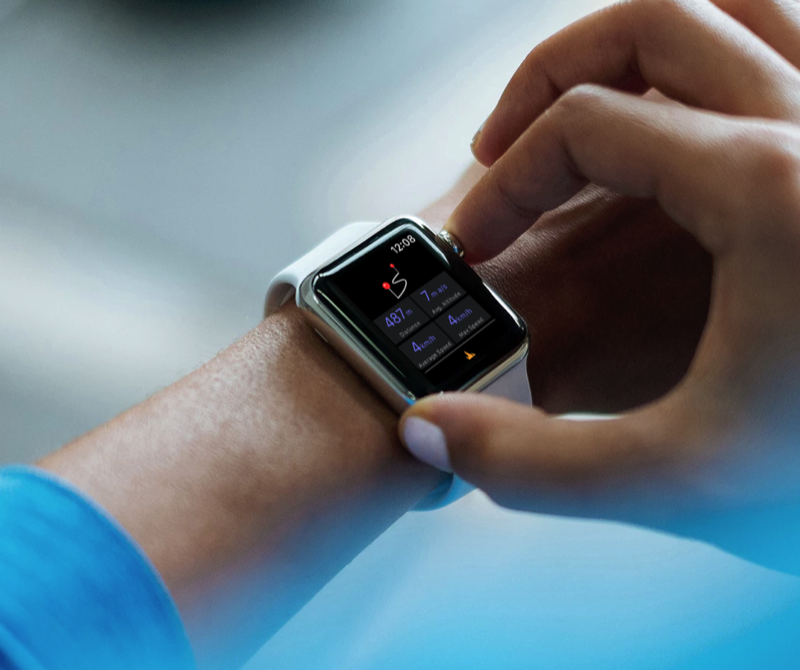 Image slide caption
 -
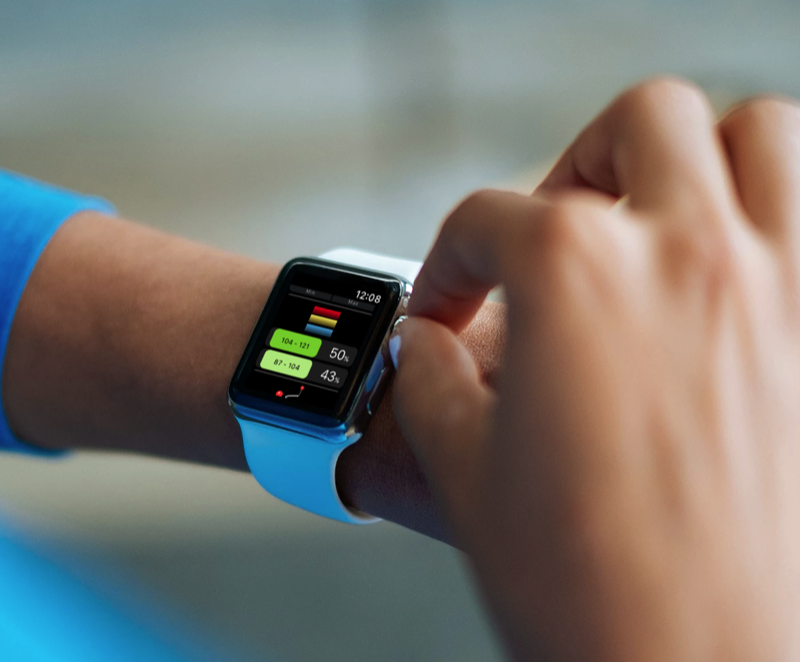 Image slide caption
 -
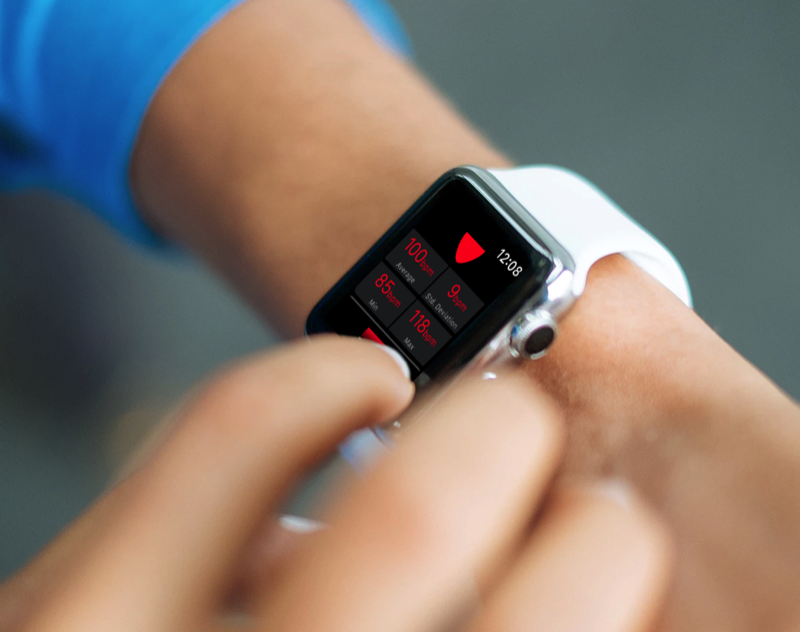 Image slide caption
 -
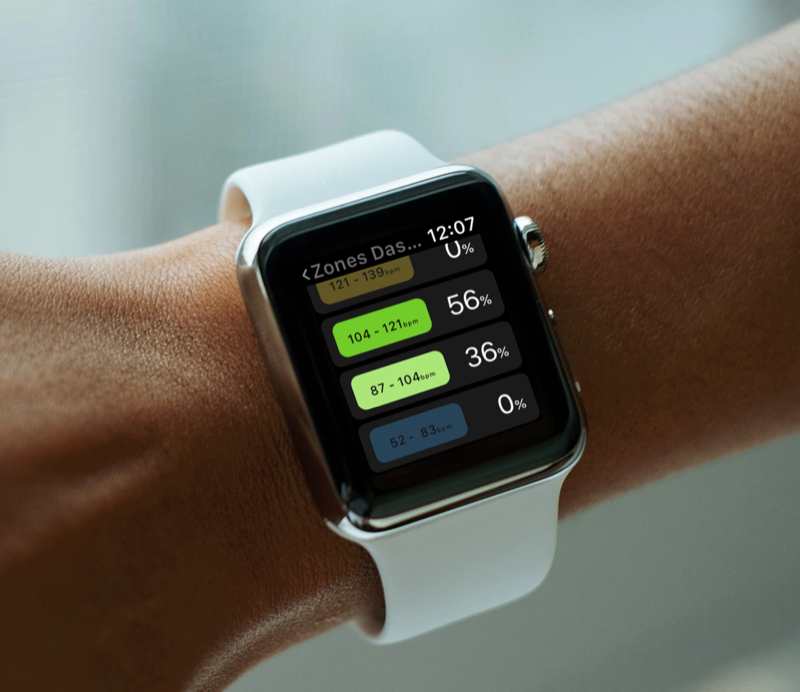 Image slide caption
 -
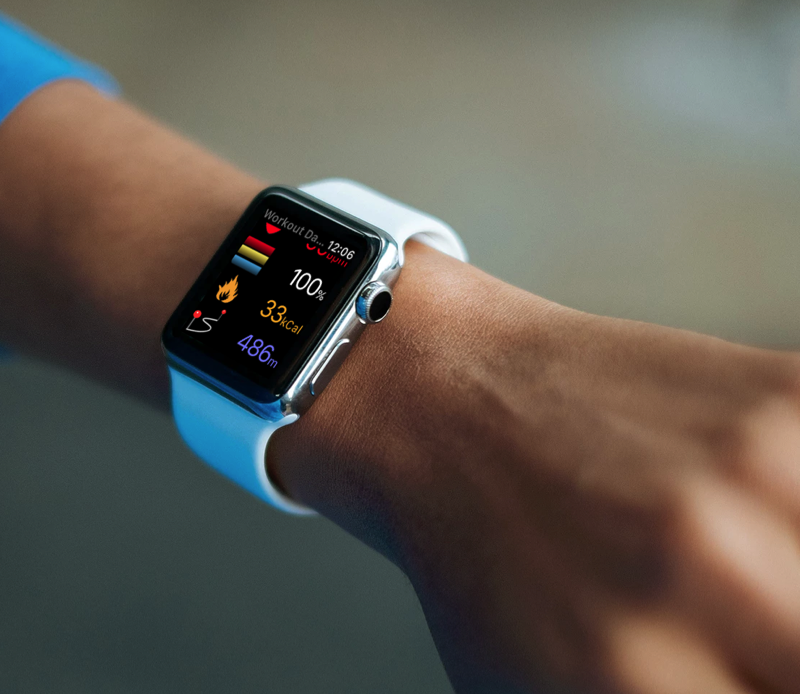 Image slide caption
 -
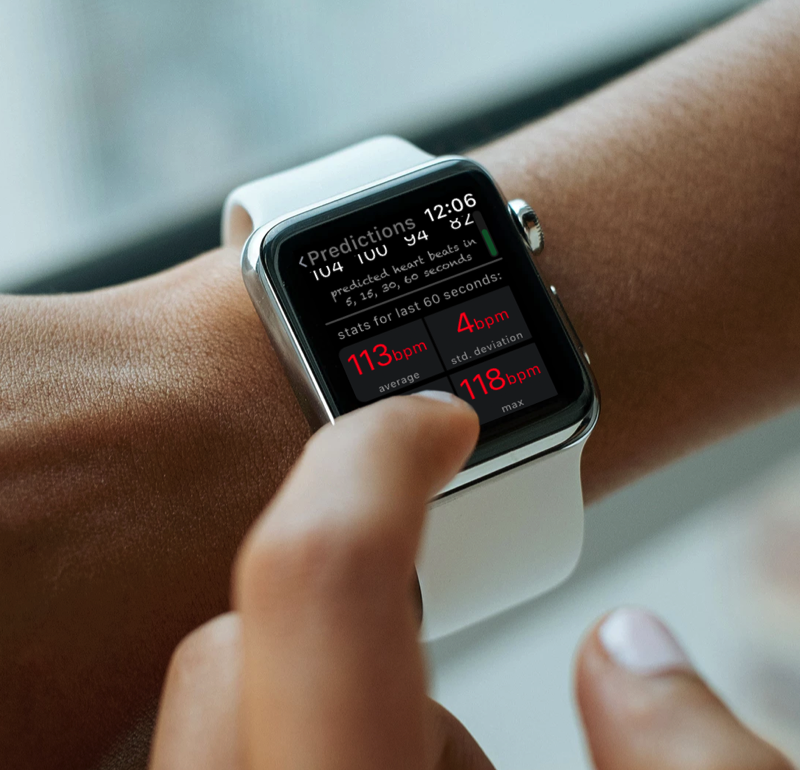 Image slide caption
 -
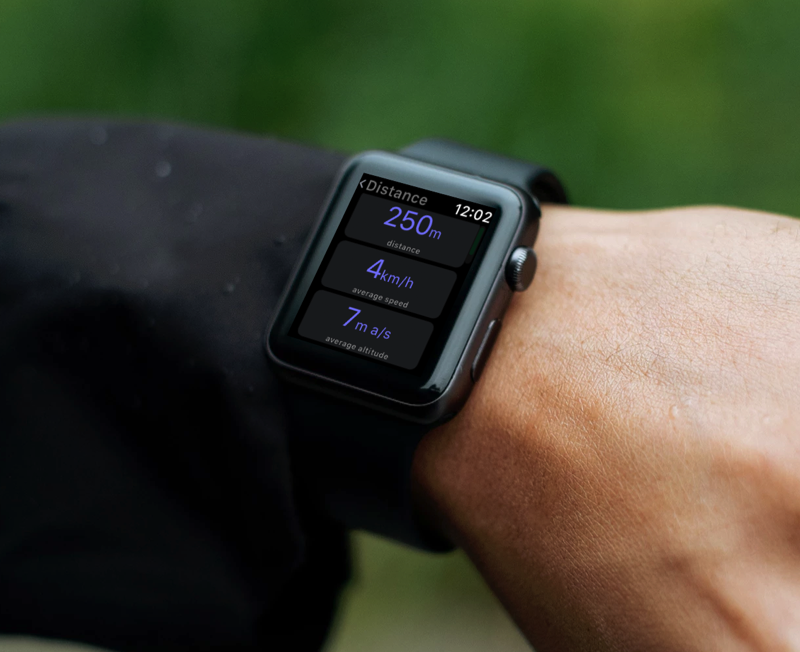 Image slide caption
 -
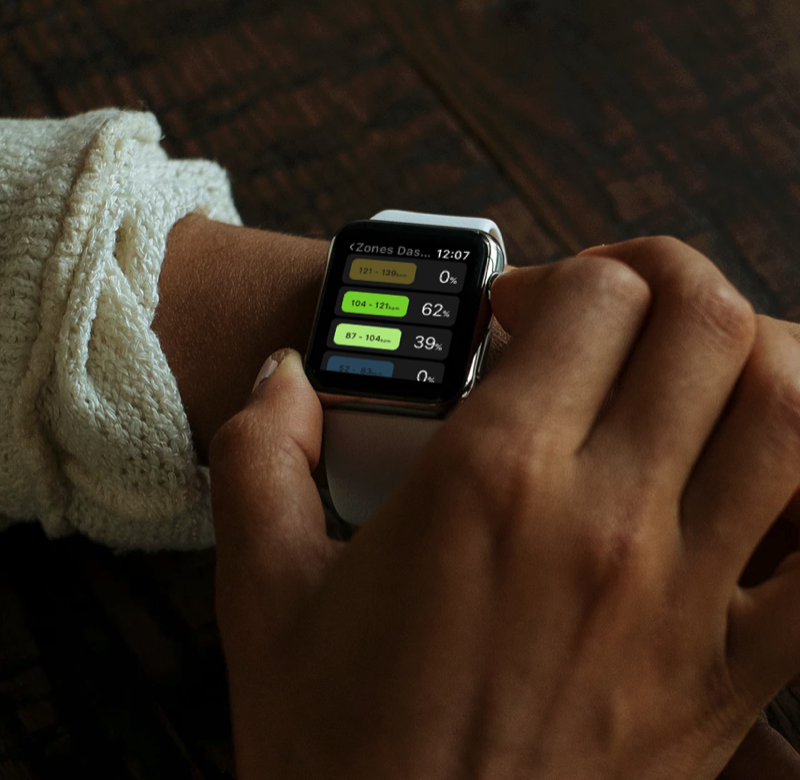 Image slide caption
 -
 Image slide caption
 -
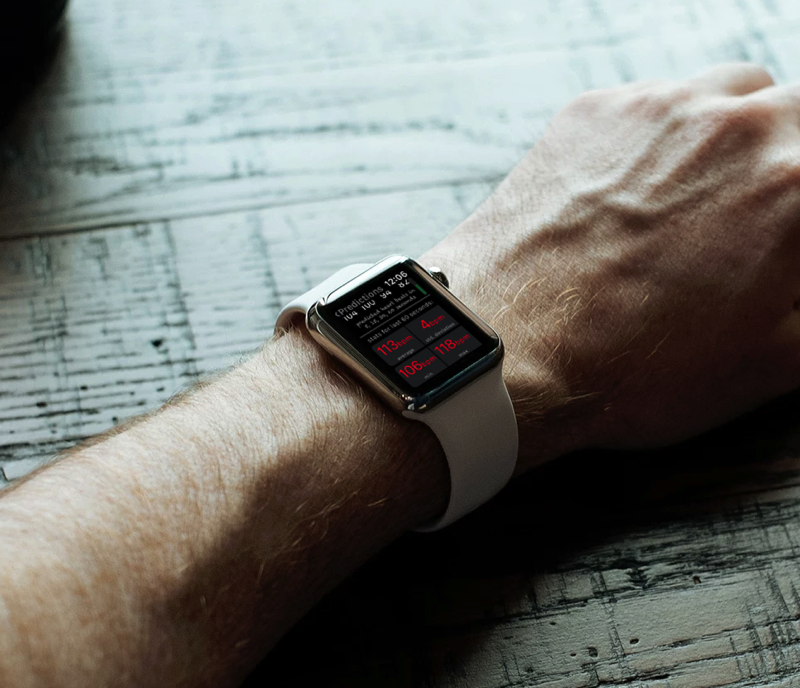 Image slide caption
 -
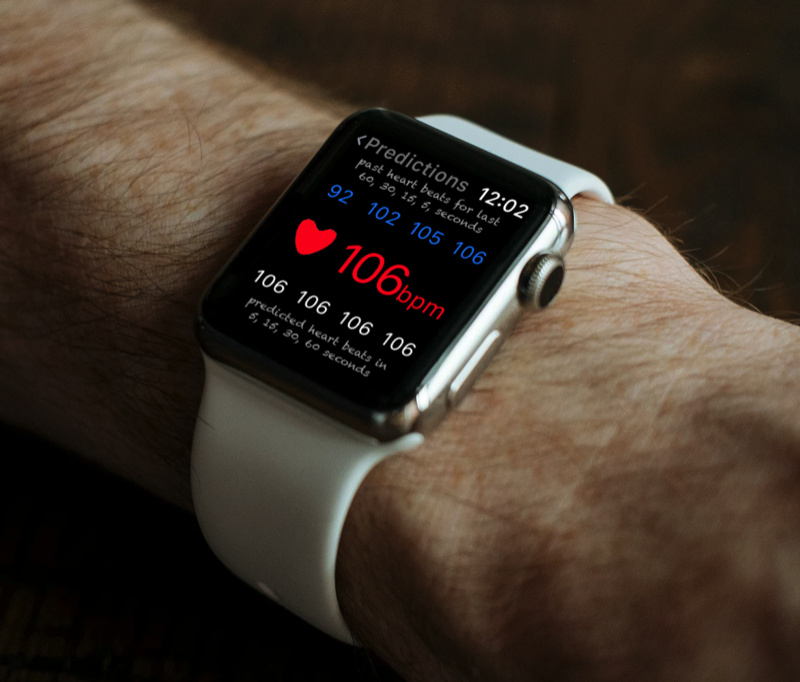 Image slide caption
App Features
Your heart rate provides insight into how efficiently you’re training, and gives you a way to quantify improvements. With zone training you can yield different benefits and are appropriate at different times during a training plan, wether that is weight loss or improved cardiovascular performance.
Features of this App:
Zone training gives you focus. Measuring your heart rate and keeping within your zones can help you from overtraining. Overtraining can lead to exercise addiction which can lead to negative physiological and psychological effects, constant muscle soreness, elevated resting heart rate, burnout, reduced variability, elevated blood pressure, lack of appetite and even becoming moody.
Not working hard enough, and you stagnate, your body will not shape up, you stay as you are.
To get the best out of the App it is recommended you use a Bluetooth Heart Rate Monitor like the Polar H7 Smart Sensor or Wahoo TICKR Sensor.
Stats on your Route: Speed, Avg Heart Rate, Altitude
Out of Zone, increase pace !
Get help: tap on ℹ️ to get help in the current screen
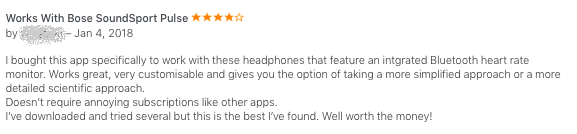
You heart rate in graph format, which zones you touched.
Resting Heart Rate with Bluetooth Heart Rate Monitor
Automatically update your weight with a Wifi scale
Create your own cardio and fat burn zone
tap on cm, inch, kg, lbs, stone to change metric
I don't have a bluetooth heart sensor or Apple Watch
Tips, troubleshoot & Bluetooth pairing
- Close other heart rate monitor Apps.
- Tap the reset/refresh icon in the navigation bar at the top of the HOME screen.
- Disconnect any other bluetooth devices connected to your iOS device, or/and close any Apps using Bluetooth.
- If you have a 2nd or more bluetooth device nearby, and also paired your heart rate sensor previously with those devices, check if the sensor has not already connected to the other devices(s).
- Check the sensor battery, is it charged, is correctly fitted/inserted ?
- If available, perform diagnostics using the manufacturer’s diagnostics tool/App
- Unpair the sensor, then pair it again
- Turn off Bluetooth on both your iOS device and sensor, wait 10 seconds, and turn on again
- Contact the manufacturer, your sensor might be faulty.
Solve Apple Watch Communication problems
Supported devices
This App has been tested with
- Polar H7 Smart Sensor
- Wahoo TICKR sensor
Of course your Apple Watch has its own sensor, so you use the Watch App, and run it as a standalone, no need to view your heart rate on iPhone and Watch, after all, you can not look at two places at once ?
The following devices are supported:
iPod
- iPod Touch (5th generation)
iPhone
- iPhone 4s
- iPhone 5
- iPhone 5c
- iPhone 5s
- iPhone 6
- iPhone 6 Plus
- iPhone 6s
- iPhone 6s Plus
- iPhone 7
- iPhone 7 Plus
iPad
- iPad, 3rd generation
- iPad, 4th generation
- iPad mini
- iPad mini 2
- iPad mini 3
- iPad mini 4
- iPad Air
- iPad Air 2
- iPad Pro
Apple Watch
- Apple Watch Series 1
- Apple Watch Series 2
Data Privacy
Battery issues
The Maths
y=Χβ+ε
where
- Χ is the regressors, or in plain english it will be 5, 15, 30 and 60 seconds time points where we want to predict your heart rate.
- β is the regression coefficients. Statistical estimation and inference determines these values and are interpreted as the partial derivatives of the depend variable with respect to the independent variables. In the case of this app a sample of previous heart rate measures. There are more than one methodology to calculate these estimates, the one we use a technique as ordinary least squares (OLS) that minimise the sum of squared residuals to estimate the parameter β such that: β=(ΧTX)-1ΧTy holds
- ε is the error term or sometimes known as noise. This variables captures things that might influence the model are not intended to take into account. For example while your running you take a sip of water, meaning might have to slow down for that second or two to grab the bottle, maybe pull up your pants while running (because you lost weight since you bought new gear), or there might be some radio interference and the bluetooth transmitter skipped a beat. These are grossly taken into account within the model.
Like all models there are assumptions and without going into the nitty gritty of the maths, they are:
- We assume weak exogeneity. It simply means our heart rate is not random; we don’t expect a heart rate of 140 bpm and then suddenly 60 bpm within 1 second.
- Linearity. We assume that the average of heart rate measurement is a linear combination of the regressions coefficients and time.
- Homoscedasticity. It means that within out time frame of the model (i.e. 60 seconds), all the response variables has the same variance (i.e. volatility) in regard of the predators variables (in the App time is the predictor).
- Independence of errors. The model assumes that the errors in the response variables are uncorrelated. (i.e. unrelated). For example, we say that the fact that you pick up a water bottle can not be predicted and is random.
- Lack of multicollinearity. Since the prediction time is under 60 seconds this does not apply, unless your training repetition is under 60 seconds.
Resting Heart Rate & VO2 Max Test Instructions
To get a reliable test result follow these basic requirements:
1 Mile Brisk Walk VO2 Max Test Instructions
Tips:
3 Minute Step VO2 Max Test Instructions
Tips:
1½ Mile Run VO2 Max Test Instructions
Tips
-
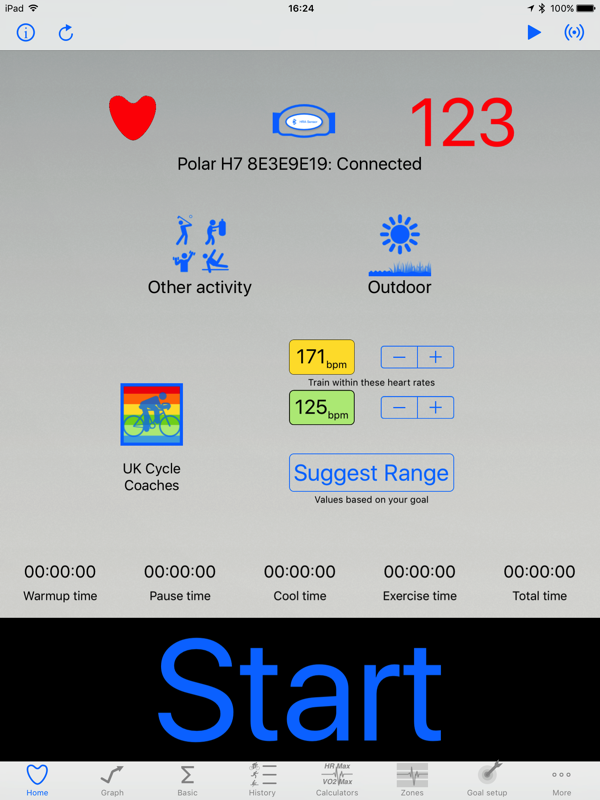 Image slide caption
 -
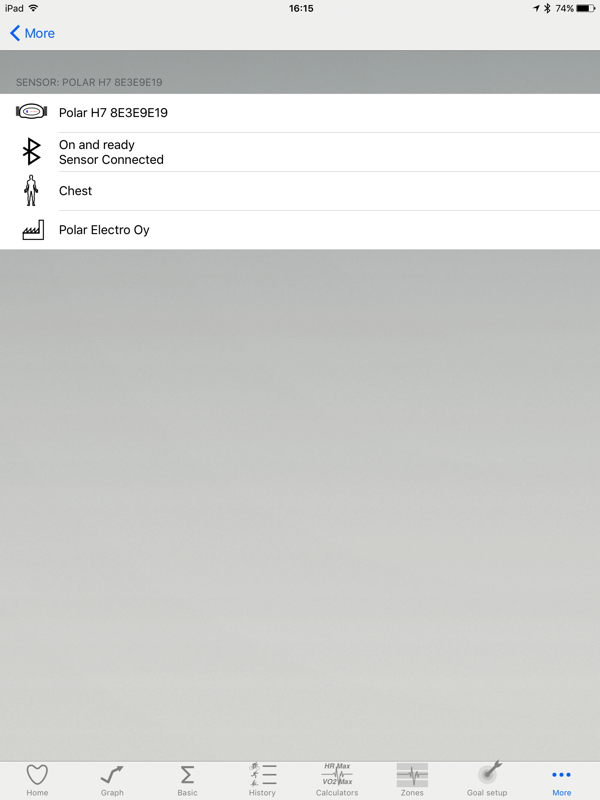 Image slide caption
 -
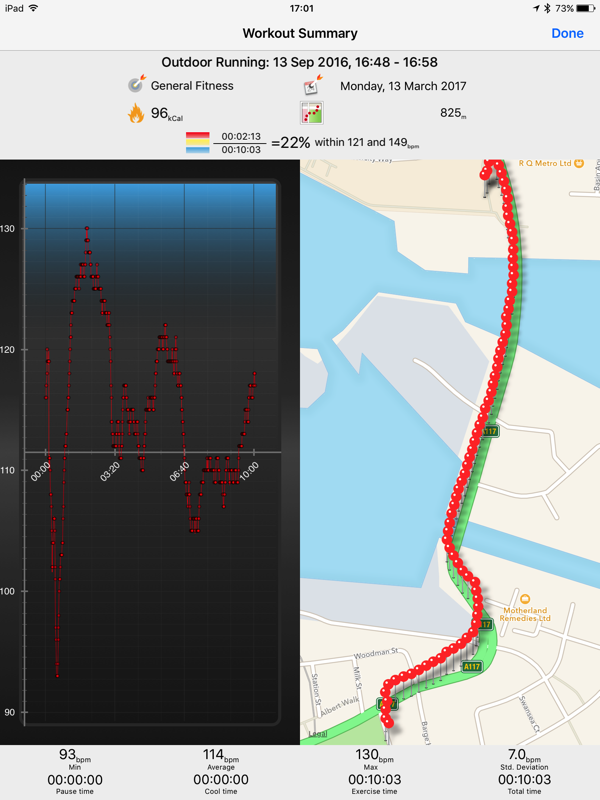 Image slide caption
 -
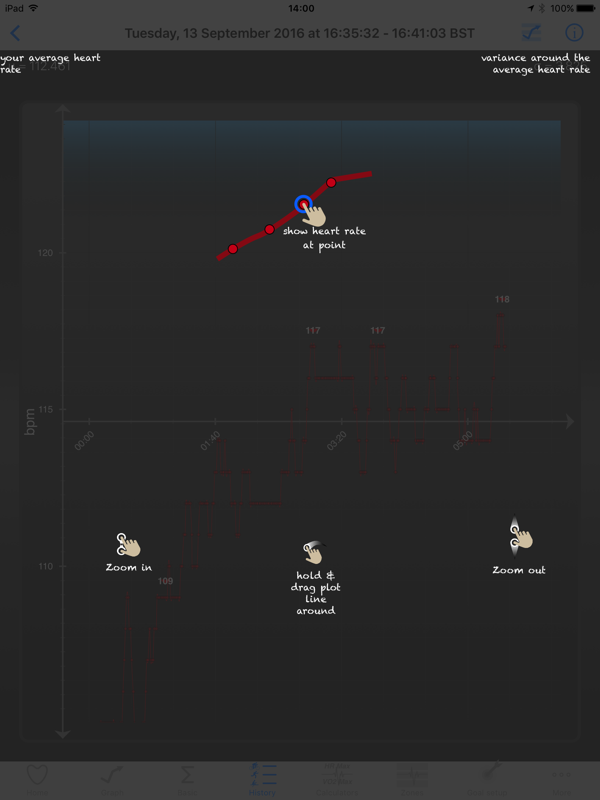 Image slide caption
 -
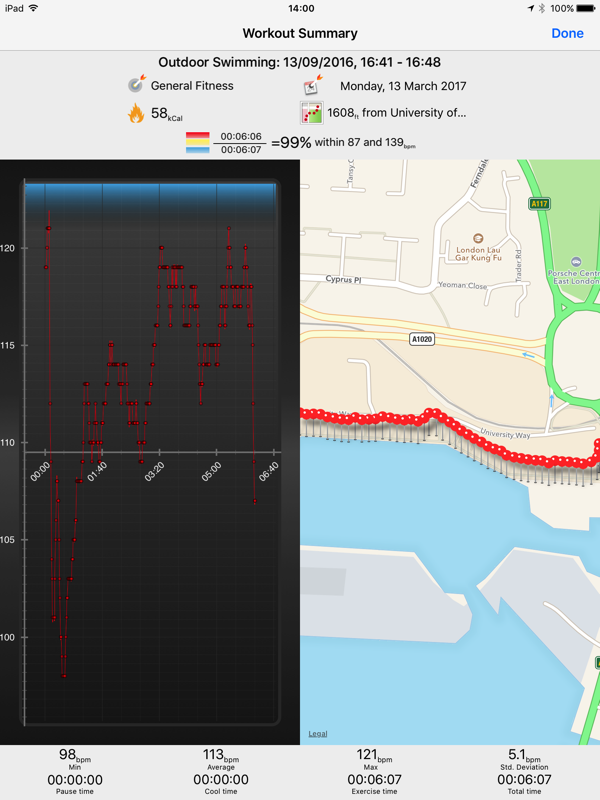 Image slide caption
 -
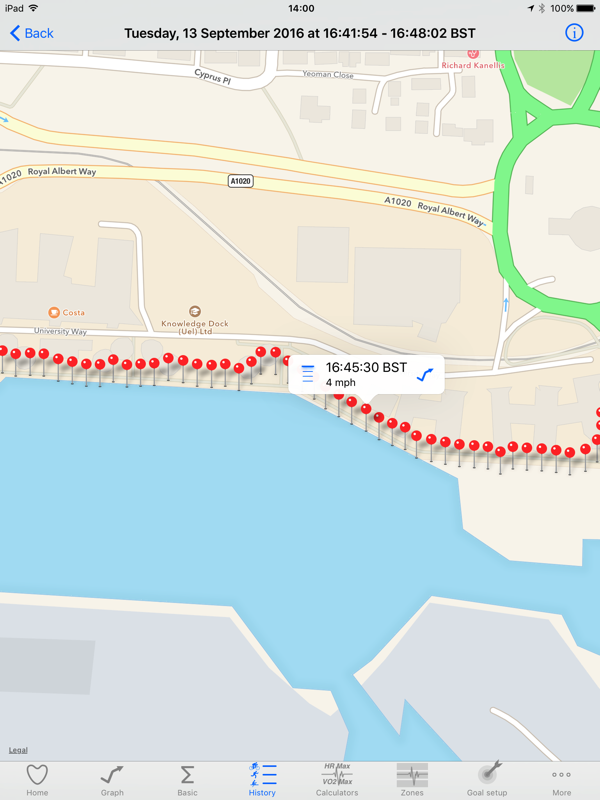 Image slide caption
 -
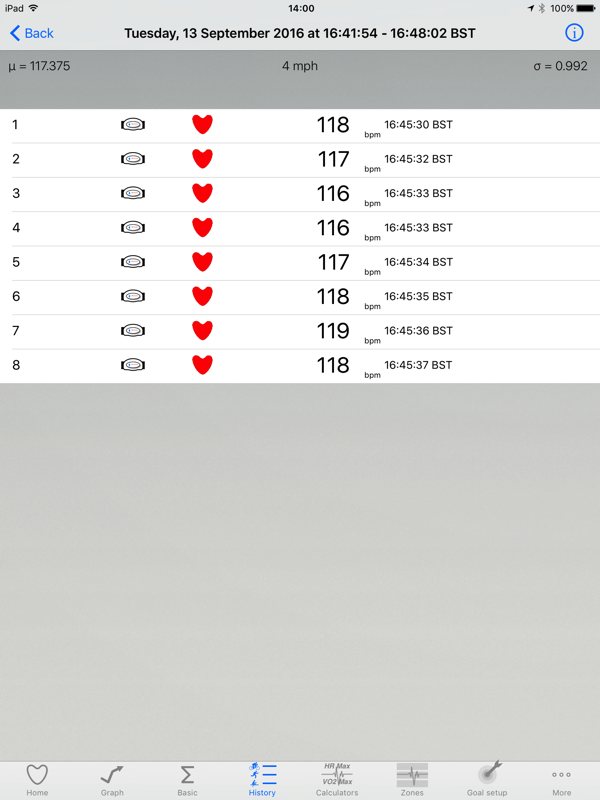 Image slide caption
 -
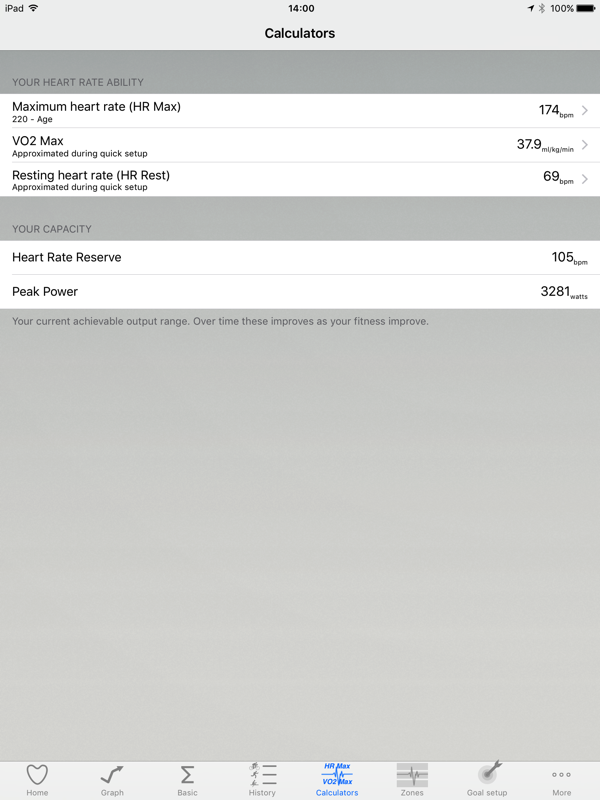 Image slide caption
 -
 Image slide caption
 -
 Image slide caption
 -
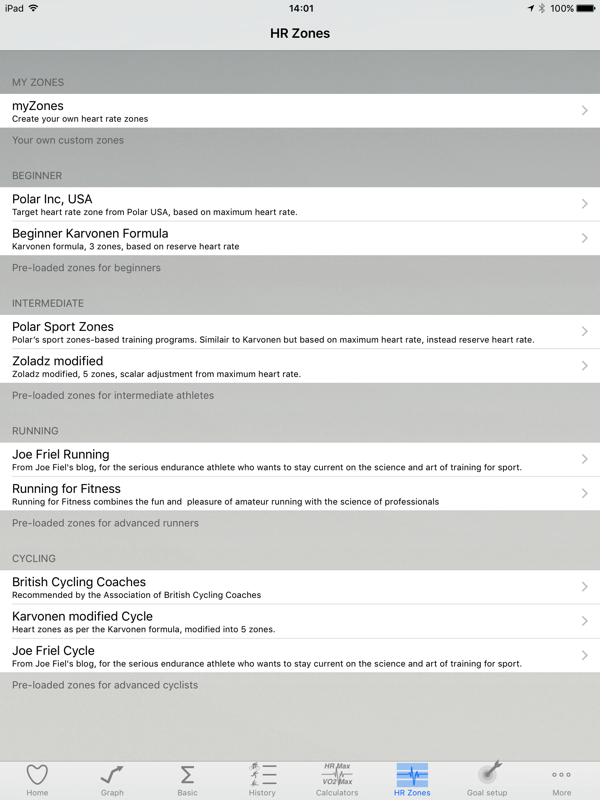 Image slide caption
 -
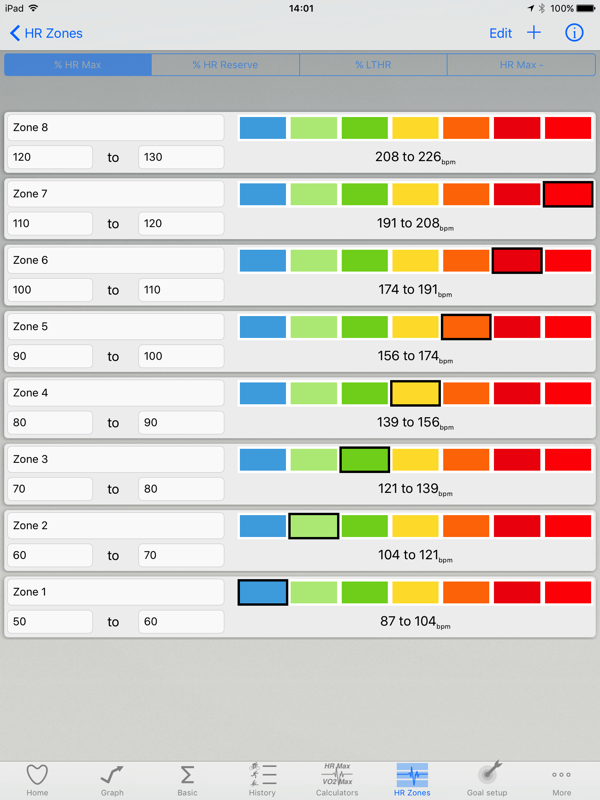 Image slide caption
 -
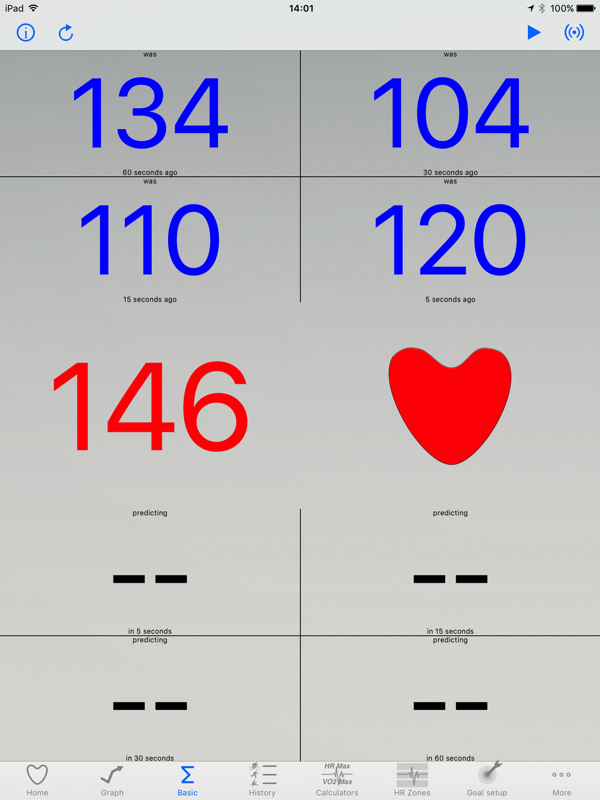 Image slide caption
 -
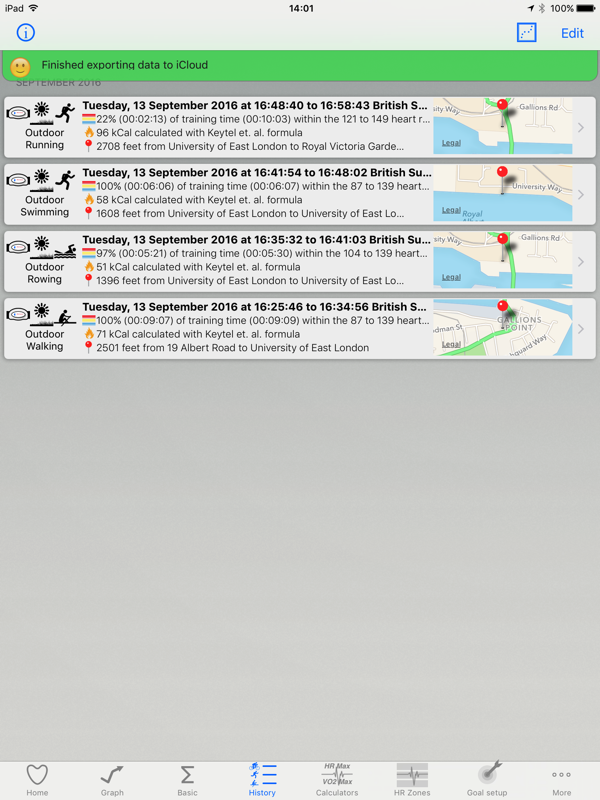 Image slide caption
 -
 Image slide caption
 -
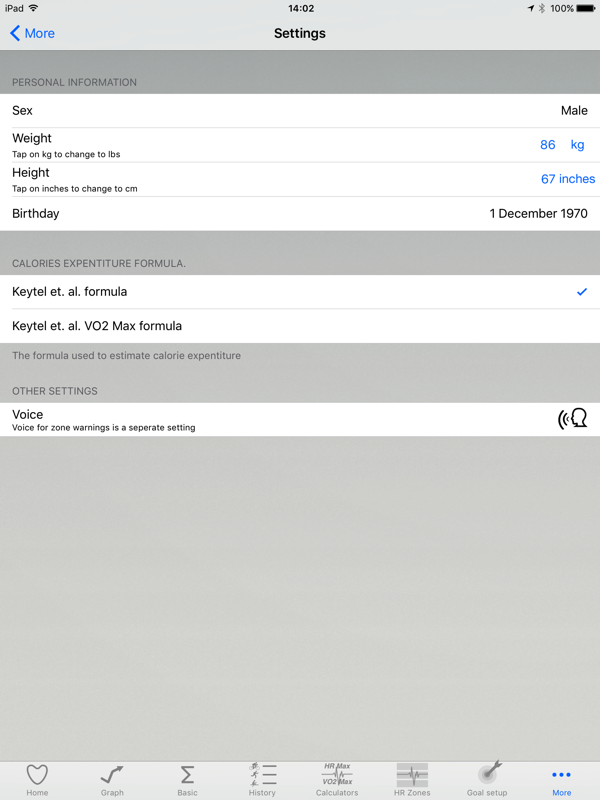 Image slide caption
 -
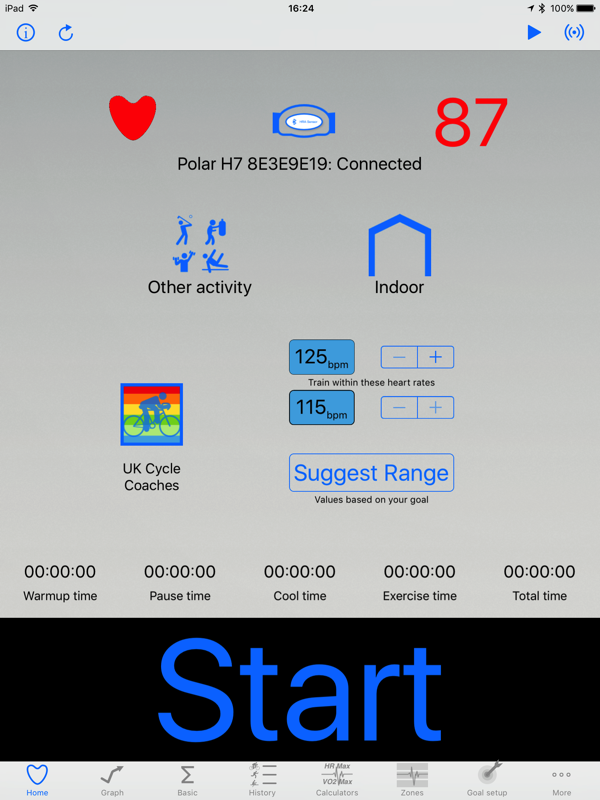 Image slide caption
 -
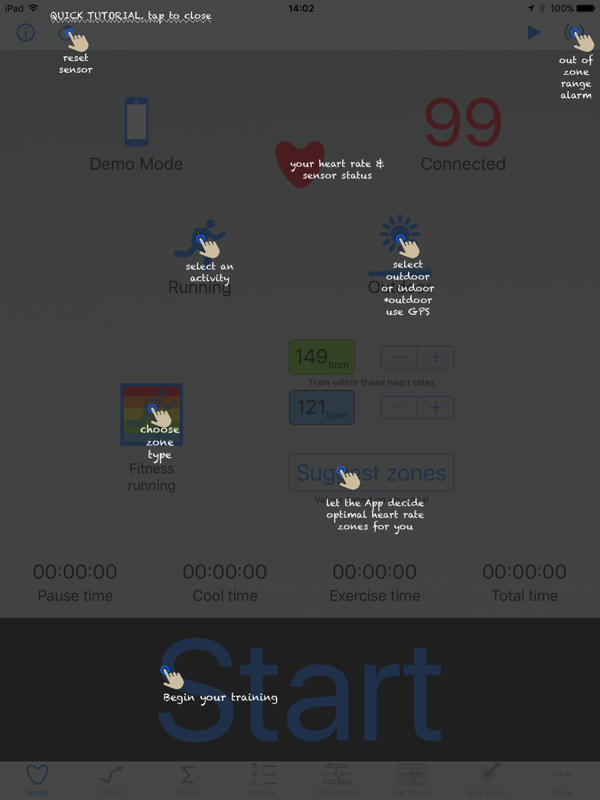 Image slide caption
 -
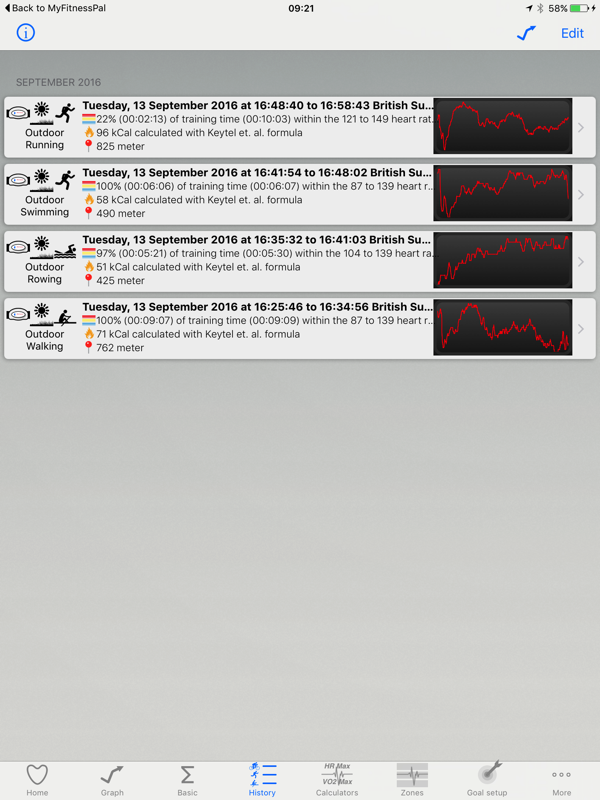 Image slide caption
 -
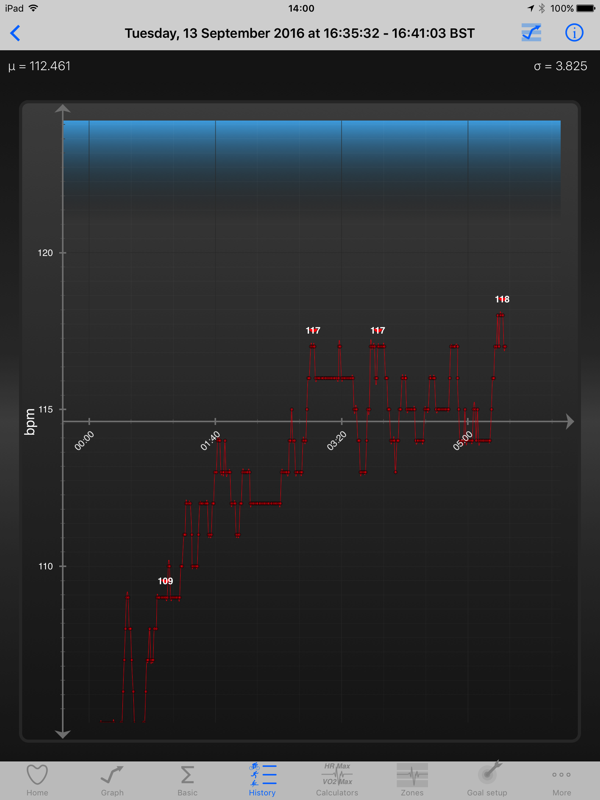 Image slide caption
iPad and iPad Pro
-
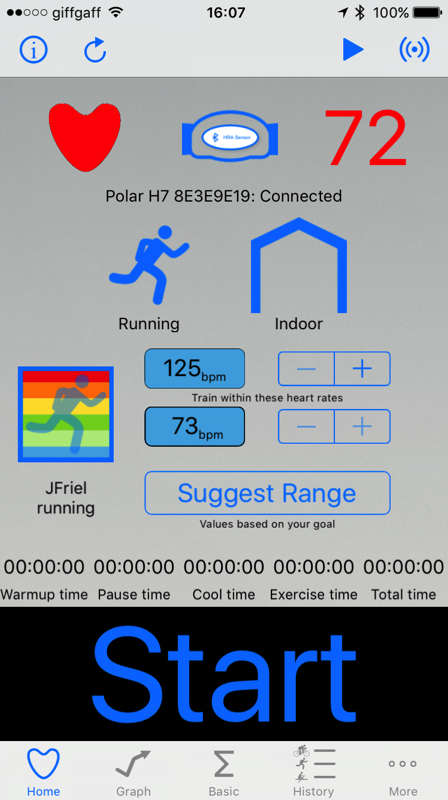 Image slide caption
 -
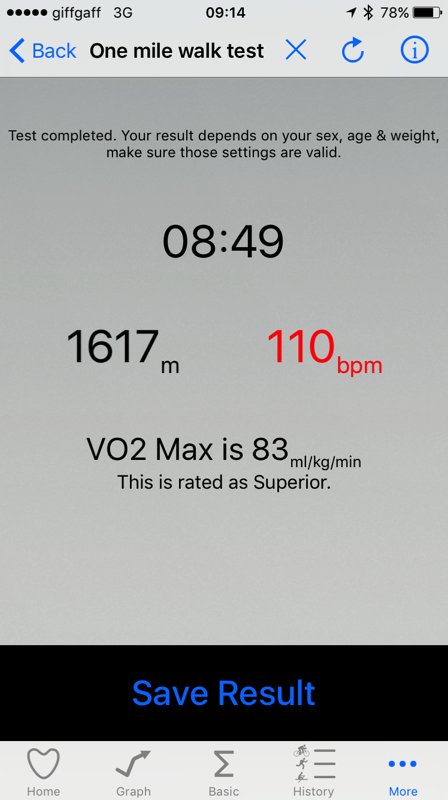 Image slide caption
 -
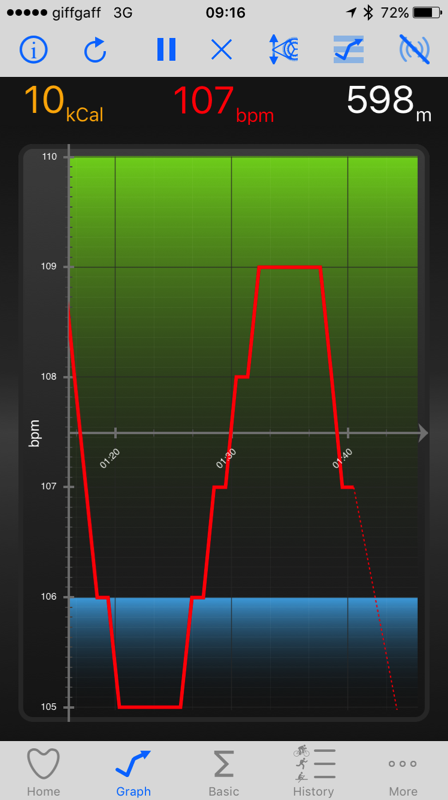 Image slide caption
 -
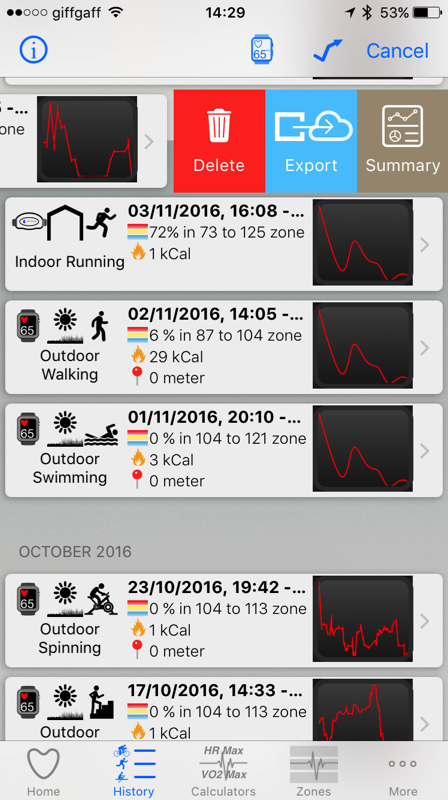 Image slide caption
 -
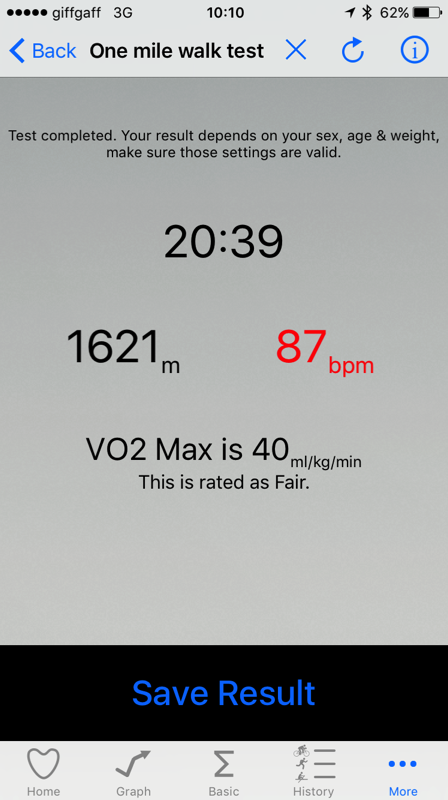 Image slide caption
 -
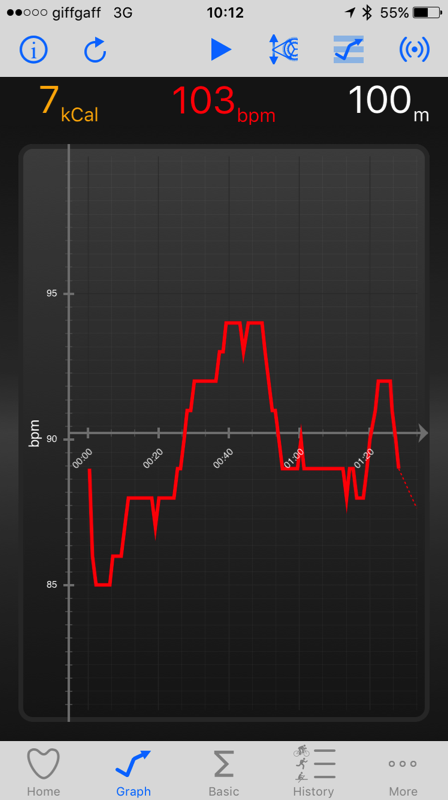 Image slide caption
 -
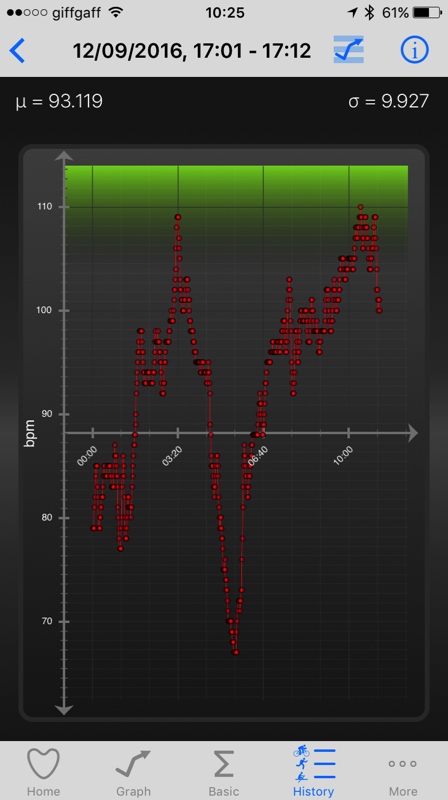 Image slide caption
 -
 Image slide caption
 -
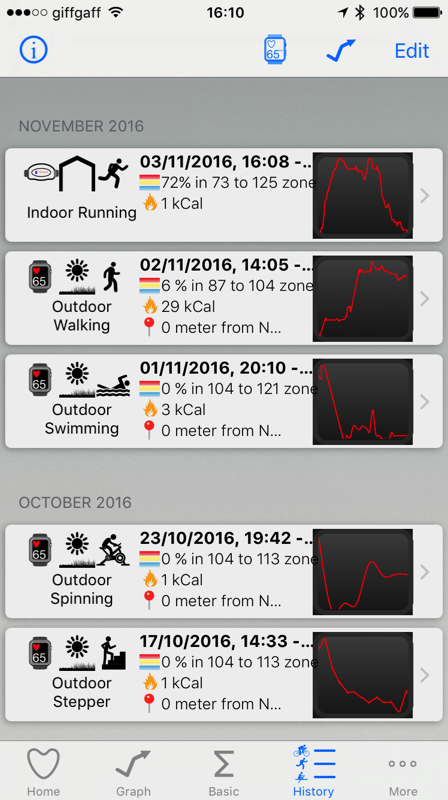 Image slide caption
 -
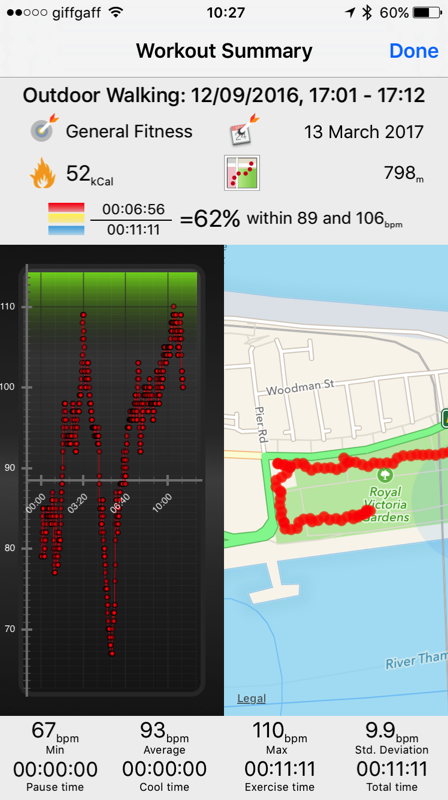 Image slide caption
 -
 Image slide caption
 -
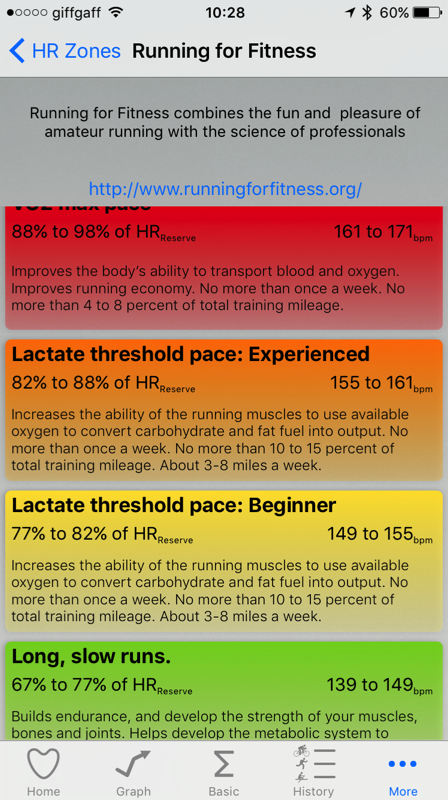 Image slide caption
 -
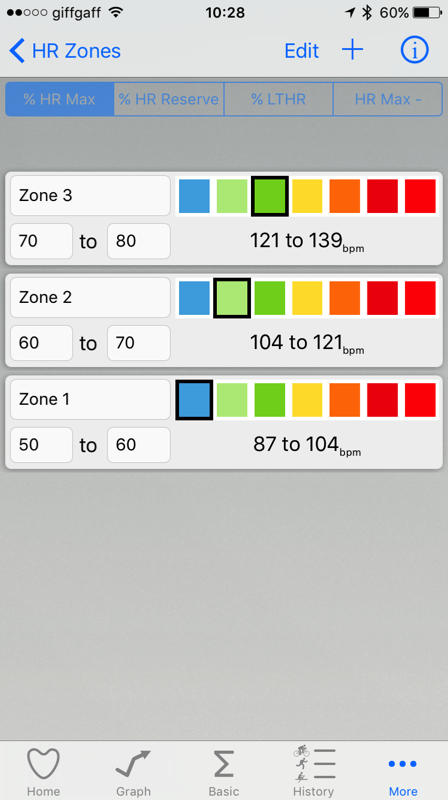 Image slide caption
 -
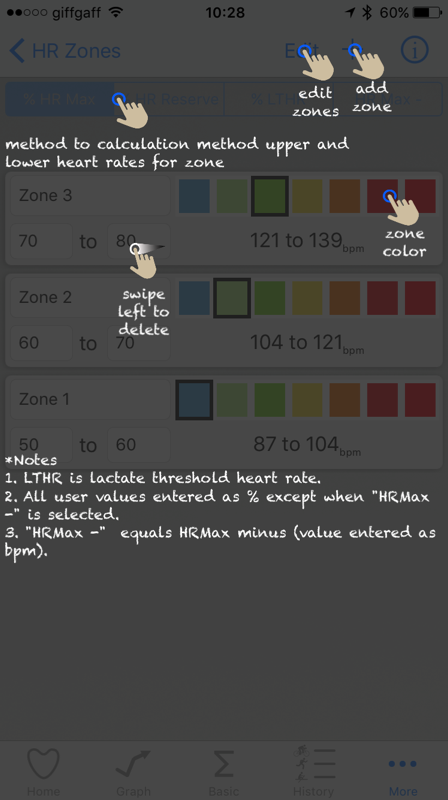 Image slide caption
 -
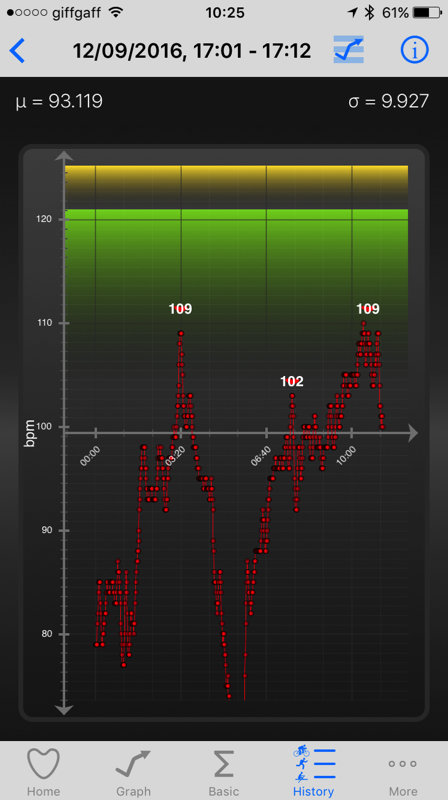 Image slide caption
 -
 Image slide caption
 -
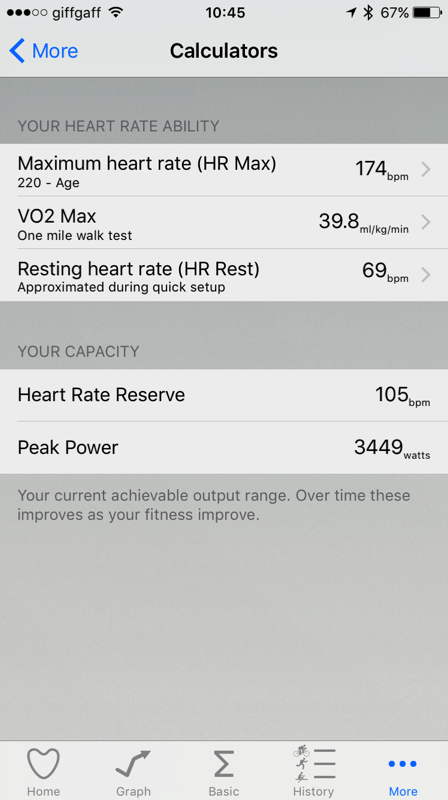 Image slide caption
 -
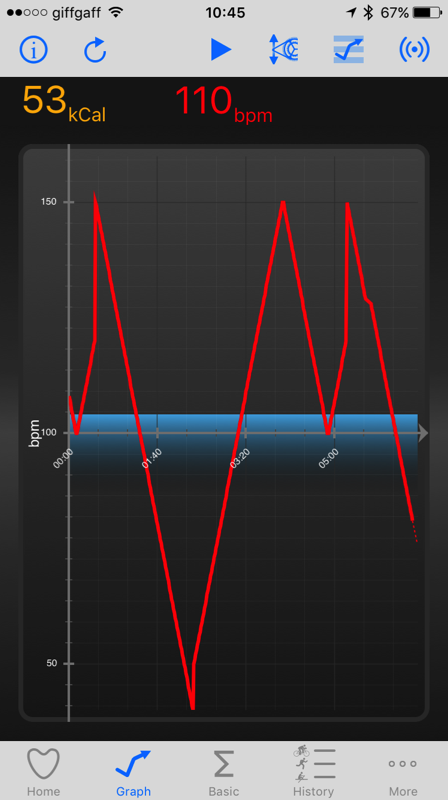 Image slide caption
 -
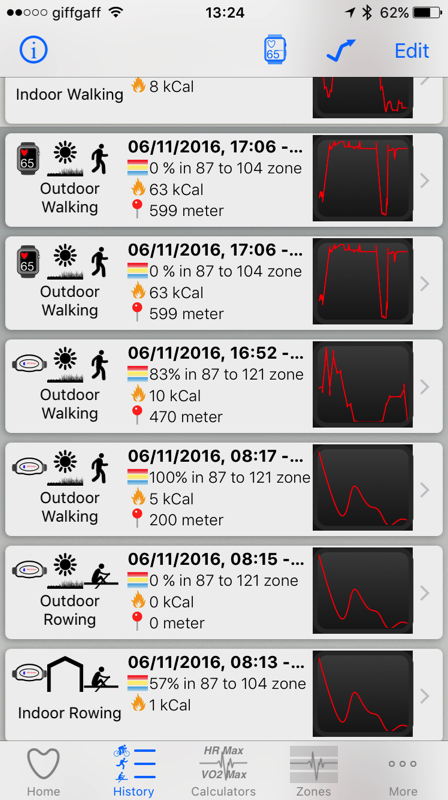 Image slide caption
 -
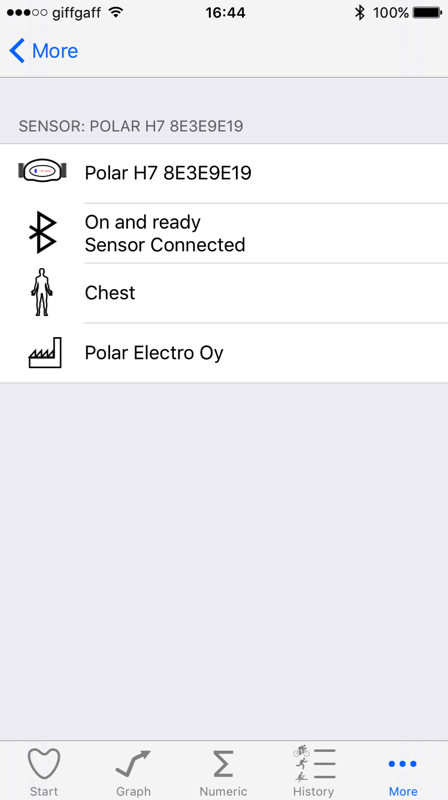 Image slide caption
iPhone and iPod
-
 Image slide caption
 -
 Image slide caption
 -
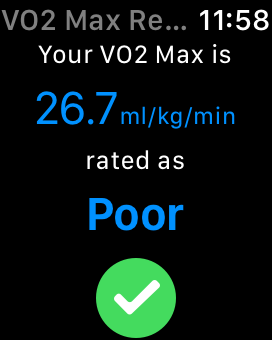 Image slide caption
 -
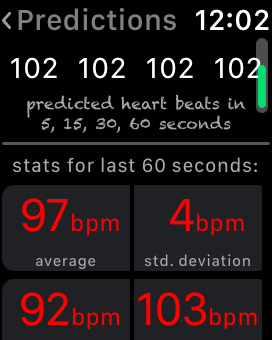 Image slide caption
 -
 Image slide caption
 -
 Image slide caption
 -
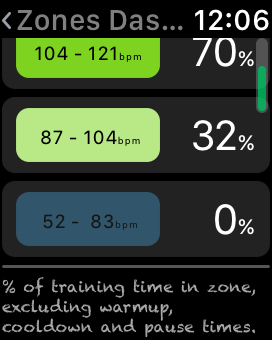 Image slide caption
 -
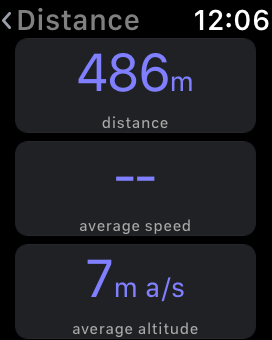 Image slide caption
 -
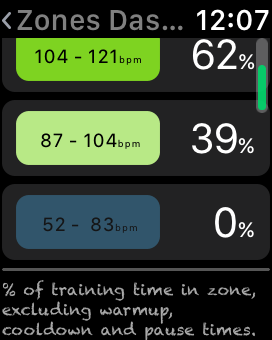 Image slide caption
 -
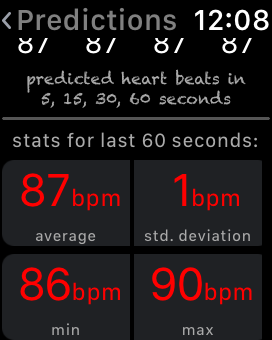 Image slide caption
 -
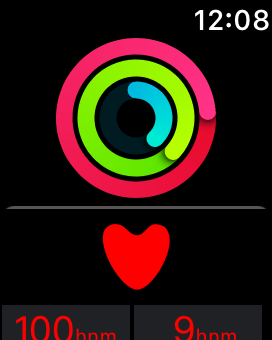 Image slide caption
 -
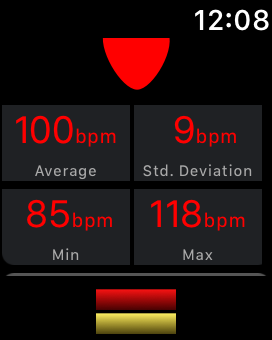 Image slide caption
 -
 Image slide caption
 -
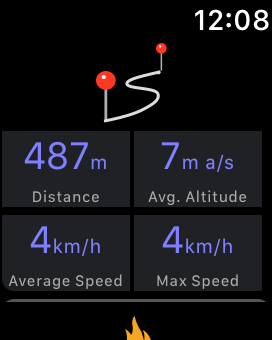 Image slide caption
 -
 Image slide caption
 -
 Image slide caption
 -
 Image slide caption
 -
 Image slide caption
 -
 Image slide caption
 -
 Image slide caption
Apple Watch